This article contains affiliate links. If you purchase through these links, we may earn a commission at no additional cost to you.
Learning how to create 3D models with AI is becoming a practical option for people who want to design game characters, product concepts, digital objects, or 3D-printing projects without spending months learning traditional modeling software. Instead of building every shape manually, you can describe an object in text or upload a reference image and let an AI tool generate an initial 3D model. This makes it easier to experiment with ideas, especially when you have a clear concept but lack the technical skills to create it from scratch.
However, AI doesn’t completely eliminate the need to understand how 3D models work. Generated objects may still have problems with their shapes, proportions, textures, or underlying geometry. A model that looks impressive in a preview may require additional editing before it can be animated, printed, or used in a video game. Knowing what to check after generation is just as important as knowing how to write a good prompt.
The good news is that beginners don’t need to master every technical aspect of 3D modeling before getting started. With a basic understanding of the process and realistic expectations about what AI can accomplish, you can create simple models, experiment with different styles, and gradually develop more advanced projects. This guide explains how the process works, what tools you’ll need, and how to avoid common mistakes.
What Is AI 3D Model Generation?
AI 3D model generation uses artificial intelligence to create three-dimensional digital objects from written descriptions, reference images, or other supported inputs. Rather than manually constructing every part of an object, you provide information about what you want to create, and the AI attempts to generate a model that matches your instructions.
Traditional 3D modeling software, such as Blender, gives creators detailed control over geometry, materials, lighting, and animation. However, building an object manually can require considerable practice, particularly when working with complex shapes or realistic characters. AI-assisted modeling changes the starting point by generating an initial version that you can inspect, refine, or edit further.
Two of the most common methods are text-to-3D and image-to-3D generation. Text-to-3D starts with a written description, while image-to-3D uses a photograph, drawing, or other visual reference. Both approaches can help reduce the amount of manual modeling required, although they work best when the input clearly communicates the intended shape and appearance.
For example, someone developing a small fantasy game might use AI to generate an initial treasure chest, wooden barrel, or stylized character. Instead of spending hours constructing the first version, they can concentrate on evaluating the design and making adjustments. The generated result may not be ready for the final game immediately, but it can provide a useful starting point.
How to Create 3D Models With AI Step by Step
Most beginner-friendly AI modeling platforms follow a similar process. You start by deciding what to create, provide a text prompt or reference image, generate the model, and review the result before exporting it. Some tools also include texturing, mesh optimization, rigging, and animation features, although these capabilities vary between platforms.
The important thing is to treat the process as a series of decisions rather than expecting one prompt to produce a perfect final asset. A little preparation before generation can save time later, particularly when you’re creating something for a specific project.
Step 1: Decide What You Want to Create
Before opening an AI modeling tool, think about how you intend to use the finished model. A decorative object for a digital scene has different requirements from a character that needs to move naturally in a game. Similarly, a model intended for 3D printing must meet physical requirements that don’t necessarily apply to objects used only on a screen.
For beginners, starting with a relatively simple object is usually the most manageable approach. A wooden treasure chest, small robot, desk lamp, or cartoon-style character gives you enough detail to explore the technology without introducing too many complicated shapes. Once you understand how the platform handles these objects, you can gradually move toward more detailed models.
It also helps to decide on the visual style before generating anything. A realistic medieval treasure chest will look very different from a colorful, low-poly version designed for a casual mobile game. Being specific about the style helps the AI make decisions that are more consistent with your intended result.
If you’re planning to use the model in a larger project, consider how it will fit alongside your existing assets. Consistent proportions, materials, and visual styles can make a collection of AI-generated objects feel more cohesive rather than looking like unrelated designs.
Step 2: Write a Clear Text Prompt or Upload a Reference Image
The quality of your instructions can strongly influence the generated result. A vague prompt leaves many details open to interpretation, including the object’s proportions, materials, colors, and overall appearance. This is why learning how to use AI tools effectively starts with giving clear, specific instructions rather than expecting the AI to understand every detail of your idea.
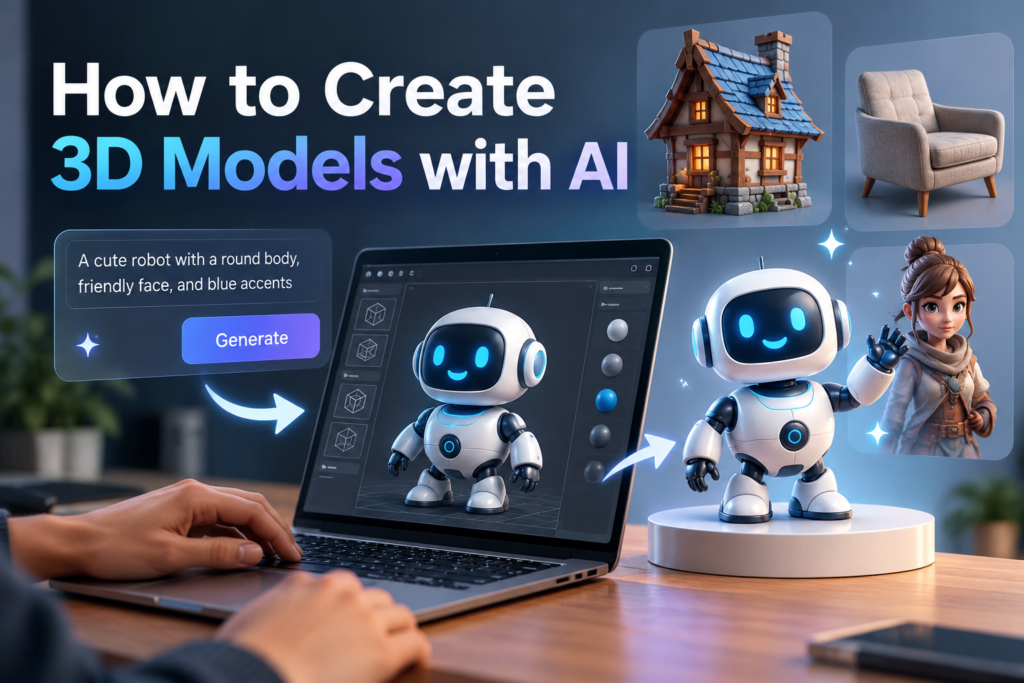
“Create a small, friendly robot with a rounded body, short mechanical arms, two large circular eyes, and a simple white-and-blue color scheme. Use a clean, stylized design suitable for a casual video game.”
This description provides enough direction without becoming unnecessarily complicated. It tells the AI what the object is, which details matter, and how the final design should look. If the first result isn’t quite right, you can revise the description to clarify specific features rather than rewriting everything.
For image-to-3D generation, the reference image becomes equally important. Choose an image with a clearly visible subject, consistent lighting, and as few distracting background elements as possible. A photograph showing several overlapping objects can make it difficult for the AI to determine which shapes belong to the subject.
Some platforms support multiple reference images, allowing you to provide front, side, and back views. This can be particularly helpful for characters and objects with complicated shapes because a single photograph doesn’t reveal every surface. Even with multiple views, however, the resulting model should still be checked for accuracy.
Step 3: Generate Your First 3D Model
Once your prompt or reference image is ready, submit it to your chosen AI modeling platform. The system will analyze the input and attempt to create a three-dimensional representation of your concept. Generation time depends on the platform, the complexity of the request, and the processing resources available.
Different tools offer different levels of functionality. Some focus primarily on creating static 3D objects, while others provide additional capabilities for materials, textures, animation, and character preparation. A platform that generates a visually attractive model isn’t necessarily the best choice if you eventually need to animate that model or use it in a game engine.
For example, V2Fun is a browser-based AI 3D creation platform that offers text-to-3D and image-to-3D generation alongside tools for texturing, automatic rigging, and animation. Its workflow is intended to bring several stages of 3D asset creation into one environment, although the quality and suitability of individual outputs still need to be evaluated.
For your first attempt, focus on understanding how the system interprets your instructions. Compare the generated object with your original concept and identify which details were reproduced accurately. You may find that the overall shape looks correct while smaller elements, such as handles, facial features, or decorative patterns, need further refinement.
Don’t assume that generating several versions means you’re doing something wrong. Iteration is a normal part of creative work, whether you’re using AI or traditional modeling software. The goal is to arrive at a useful starting point that can be improved, not necessarily to produce a perfect model on the first attempt.
Step 4: Inspect the Model From Different Angles
One of the most common beginner mistakes is judging a generated 3D model only by its preview image. An object may look convincing from the front but contain distorted or missing details on its sides or back. This happens because AI systems may interpret some parts of an object more accurately than others, especially when the original reference doesn’t show every surface.
After generation, rotate the model and examine it from several directions. Look at the front, back, sides, top, and bottom, paying particular attention to areas that weren’t clearly described in your prompt or visible in your reference image.
For example, an AI-generated chair might have a convincing seat and backrest but uneven legs. A character may look recognizable from the front while having unusual hands, inconsistent proportions, or overlapping clothing details. These problems may not matter for a distant background object, but they become more noticeable when the model is viewed up close or animated.
It’s also worth checking whether separate components are connected correctly. A robot’s arm may appear attached in a preview but contain awkward geometry around the shoulder. Similarly, decorative details may intersect with the main object in ways that become obvious when you rotate it.
If the model has major structural problems, consider revising the prompt or supplying better reference images before attempting detailed editing. Correcting the original input can sometimes be easier than repairing a model that was generated with the wrong proportions or missing components.
Step 5: Refine the Geometry and Textures
Once the overall shape looks right, the next step is improving the model’s appearance and underlying structure. These are related but separate parts of 3D creation, and understanding the difference can help beginners avoid confusion.
Geometry refers to the three-dimensional structure of the object. A model is typically made from a mesh consisting of vertices, edges, and faces that define its shape. Textures and materials determine how its surfaces appear, including colors, patterns, roughness, and reflections.
For example, a wooden treasure chest might have the correct overall shape but look like smooth plastic because its materials don’t resemble wood. Adjusting the textures can improve its appearance without changing the underlying geometry. On the other hand, if the lid is misshapen or the hinges are positioned incorrectly, changing the texture won’t solve the structural problem.
Some AI platforms include automated material generation and mesh optimization tools. These can reduce manual work, but they don’t guarantee that every generated object will have suitable geometry for animation, game development, or 3D printing.
This is where traditional editing software can still be useful. Blender, for instance, provides tools for inspecting meshes, modifying geometry, adjusting materials, and preparing objects for more demanding applications. Beginners don’t need to learn every feature immediately, but basic editing knowledge becomes valuable as projects grow more complex.
If you’re creating a model for a game, pay particular attention to whether the geometry is unnecessarily complicated. A highly detailed object may look attractive but use more resources than necessary, especially when many copies appear in the same scene. Models intended for animation also need geometry that can deform appropriately when characters move.
Step 6: Export the Model for Your Project
After reviewing and refining the model, the final step is exporting it into a format supported by your intended application. Different 3D programs, game engines, and printing workflows use different file formats, so it’s worth checking compatibility before beginning a project.
Common 3D formats include GLB, FBX, and OBJ. GLB is often useful for sharing 3D assets with materials in a compact format, while FBX is commonly used in animation and game-development workflows. OBJ is widely supported for static geometry, although material handling and additional features can vary.
The right choice depends on what you plan to do next. A static decorative object may have relatively simple export requirements, while an animated character needs its skeleton, animations, and other relevant data to transfer correctly.
Before exporting, check whether the platform includes textures and materials in the downloaded file. Some workflows require additional texture files, and certain materials may appear differently when opened in another application.
It’s also important to review the platform’s licensing terms. If you plan to sell a 3D model, include it in a commercial game, or use it in client work, confirm that the service permits your intended use. Don’t assume that every AI-generated asset automatically comes with unrestricted commercial rights.
Finally, open the exported model in the application where you intend to use it. This simple check can reveal missing textures, unexpected scaling, orientation problems, or other issues that weren’t obvious inside the generation platform.
How to Create 3D Models With AI From Photos
Creating a 3D model from a photograph can be particularly useful when you already have a visual concept but don’t know how to reproduce it manually. You might have a sketch of a character, a photograph of a decorative object, or a product idea that you’d like to examine from different angles.
The process usually begins by uploading a clear image of the subject. The AI analyzes the visible shapes and attempts to reconstruct a three-dimensional object. Depending on the platform, you may be able to provide additional instructions about the desired style, materials, or level of detail.
The main limitation is that a photograph contains only a two-dimensional view of the subject. If you upload a front-facing picture of a character, the AI can see the face and clothing details but may have to estimate the shape of the back, sides, and other hidden areas. Those estimates won’t always match the original object.
For example, imagine uploading a photograph of a decorative lamp. The AI may reproduce its visible shade, base, and colors reasonably well, but the shape of the rear support or hidden components may differ from the real product. This might be acceptable for a concept illustration but unsuitable for a project requiring accurate measurements.
Multiple reference images can help reduce some of this uncertainty. Providing front, side, and back views gives the system more information about the object’s actual shape. Consistent lighting and a plain background can also make the subject easier to interpret.
Even with better references, generated models should be inspected before use. If you’re creating a model for 3D printing, you’ll need to check its physical dimensions and whether the geometry is suitable for printing. If you’re preparing a character for animation, you’ll need to consider whether its mesh and proportions will work with a skeleton.
For creative experimentation, however, image-to-3D generation can provide an accessible way to turn existing artwork and visual ideas into editable digital objects. It allows beginners to explore three-dimensional design without having to build every shape manually from the beginning.
What Can You Create With AI 3D Modeling Tools?
AI 3D modeling tools can help create everything from simple decorative objects to game characters and product concepts. They’re particularly useful for generating initial designs quickly, although some models may need additional editing before they’re ready for practical use.
Game Characters and Assets
Game developers can use AI to create characters, furniture, buildings, weapons, and environmental objects. For example, someone building a fantasy game could generate treasure chests, wooden barrels, or stone structures without modeling each object from scratch. However, these assets may still require adjustments to their geometry, textures, and level of detail before they work properly in a game engine.
Product Design and Visualization
AI can help designers visualize product ideas before developing detailed prototypes. A business exploring a new desk accessory, lamp, or piece of furniture could generate several 3D concepts to compare shapes and styles. These models are useful for early presentations and brainstorming, but they shouldn’t replace precise engineering designs when measurements and manufacturing requirements matter.
3D Printing and Custom Objects
Hobbyists can use AI to generate decorative figurines, ornaments, and other customized objects for 3D printing. For instance, someone could create a cartoon robot from a text description and refine the model before printing. However, the geometry must be checked for holes, thin walls, disconnected surfaces, and other issues that could cause a failed print.
Animation and Digital Characters
Some AI tools can help creators generate characters, add digital skeletons through automatic rigging, and apply basic animations. This can make it easier to experiment with animated content without building every component manually. More complex characters may still need adjustments to their geometry and rigging to achieve natural movement.
Common Mistakes to Avoid When Creating 3D Models With AI
AI can simplify the early stages of 3D creation, but beginners sometimes assume that a generated model is ready to use immediately. Problems with unclear prompts, inaccurate geometry, or unsupported file formats can become frustrating when the model is transferred into another application.
Understanding these common mistakes can help you spend less time regenerating objects and more time improving the results.
Writing Prompts That Are Too Vague
A prompt such as “create a modern chair” leaves the AI to decide almost everything about the design. It might generate an office chair, dining chair, or something completely different from what you intended.
Instead, describe the object’s shape, materials, colors, and intended style. For example, “a minimalist wooden dining chair with four straight legs, a curved backrest, and a natural oak finish” provides more useful direction. If the result isn’t quite right, adjust specific details rather than rewriting the entire description.
Ignoring Hidden Surfaces and Structural Problems
A model may look convincing from the front but contain distorted details on its sides or back. This is especially common when the AI works from a single reference image and has to estimate surfaces it cannot see.
Always rotate the model and inspect it from multiple angles. Look for missing components, uneven proportions, overlapping surfaces, and disconnected geometry. If the object needs to be animated or 3D printed, these problems can become more significant.
Assuming Attractive Models Are Technically Ready
A realistic texture or polished preview doesn’t necessarily mean the model has suitable geometry. An AI-generated character might look impressive but deform awkwardly during animation, while a decorative object could contain unnecessary geometric complexity.
The intended use should determine what you inspect. For game assets, consider performance and mesh complexity. For animation, examine how the geometry behaves during movement. For 3D printing, verify that the model meets the requirements of the printing process.
Forgetting About Export Compatibility
Different AI platforms support different file formats, and some exports may not preserve materials, textures, or animation data as expected.
Before choosing a platform, confirm that it supports the file formats required by your software. It’s worth generating and exporting a simple test object before investing time in a larger project. This helps identify compatibility problems early.
AI 3D Modeling vs Traditional 3D Modeling: Which Is Better?
AI-assisted and traditional 3D modeling have different strengths. AI is useful for generating concepts and exploring designs quickly, while traditional modeling gives creators more control over precise shapes, geometry, and technical requirements.
For beginners, AI can provide a convenient starting point. However, traditional software remains important for projects that require extensive customization, accurate measurements, or advanced animation.
| Feature | AI 3D Modeling | Traditional 3D Modeling |
|---|---|---|
| Learning curve | Easier for beginners to start | Requires learning modeling techniques |
| Initial creation | Generates concepts from prompts or images | Involves more manual construction |
| Creative control | Depends on prompts and editing tools | Detailed control over geometry and design |
| Accuracy | May require correction | Supports precise manual adjustments |
| Animation | Some tools include automatic rigging | Offers advanced rigging and animation controls |
| Best for | Concepts, prototypes, and experimentation | Detailed editing and production workflows |
Traditional applications such as Blender provide comprehensive tools for modeling, sculpting, texturing, and animation. Although these applications have a steeper learning curve, they allow users to make adjustments that may not be possible within an AI generator.
For many creators, combining both approaches makes the most sense. You can use AI to produce an initial concept and then refine it in traditional modeling software. This approach can save time while retaining control over the final result.
How to Choose the Right AI 3D Modeling Tool
Choosing an AI 3D modeling platform involves more than comparing attractive examples on its homepage. The best tool depends on the type of models you want to create, how much editing you expect to do, and where you plan to use the finished assets. The same considerations apply when choosing AI productivity apps for Windows and Mac, where compatibility, ease of use, and practical features often matter more than an impressive list of capabilities.
Start by looking at the available input methods. If you prefer describing ideas in writing, text-to-3D generation may be sufficient. If you already have sketches or photographs, image-to-3D support will be more useful. Platforms that accept multiple reference views may also help when the shape of an object needs to be reconstructed more accurately.
Editing features deserve equal attention. Some services mainly generate models, while others provide additional tools for textures, mesh refinement, rigging, or animation. An integrated workflow can be convenient, but there’s little reason to pay for advanced animation features if you only need static objects.
Export compatibility is another important consideration. Check whether the platform supports the file formats required by your game engine, animation software, or 3D-printing application. You should also review commercial usage rights if you plan to sell generated assets or use them in client projects.
Finally, compare pricing based on how you expect to use the service. Some platforms charge through subscriptions, while others limit the number of generations through credits. A service that looks affordable initially may become expensive if you regularly need several attempts to create a usable model.
Is It Worth Paying for an AI 3D Modeling Tool?
For beginners, starting with a free plan or trial is often the most practical choice. This gives you an opportunity to experiment with prompts, inspect generated models, and determine whether the workflow suits your needs before paying for additional features.
Free access may include restrictions on generation credits, processing speed, export formats, or commercial usage. These limitations might be acceptable for occasional experimentation but inconvenient for someone producing assets regularly.
Paid plans can be worthwhile when they provide features you genuinely need, such as more generations, additional editing options, or support for particular export formats. However, paying for a service doesn’t guarantee that every model will be suitable for your project.
A useful way to evaluate a platform is to test it with an object similar to what you actually intend to create. If it consistently produces usable starting points and reduces your editing time, the cost may be justified. If most models require extensive rebuilding, the convenience may be less valuable than expected.
Frequently Asked Questions
Can beginners create 3D models with AI without learning Blender?
Yes. Many AI 3D modeling tools allow beginners to generate models from text descriptions or reference images without learning traditional modeling software first. However, basic knowledge of geometry, textures, and file formats becomes helpful when you need to refine models or prepare them for more advanced projects.
Can AI turn a regular photo into a 3D model?
Yes, image-to-3D tools can generate models from photographs, although the results depend on the image quality and the platform. Since a single photograph doesn’t show every side of an object, the AI may estimate hidden surfaces. Multiple reference views can help improve the reconstruction.
Are AI-generated 3D models ready for video games?
Some models may be usable with minimal changes, but others require adjustments to geometry, textures, scaling, or file formats. Animated characters may also need rigging and additional testing. Always check the model inside your game engine before treating it as a finished asset.
Can I use AI-generated models for 3D printing?
Yes, provided the model has suitable geometry and dimensions for printing. Generated objects should be checked for holes, disconnected surfaces, thin walls, and other issues that could affect the finished print. Preparation in appropriate 3D-printing software may still be necessary.
Do I own the 3D models I create with AI?
Ownership and commercial usage rights depend on the platform’s terms and applicable laws. Some services permit commercial use under certain conditions, while others have restrictions based on subscription plans or content policies. Review these terms before selling models or using them in commercial projects.
Is AI 3D modeling better than traditional modeling?
AI is often more convenient for generating initial concepts, while traditional modeling provides greater control over precise geometry and complex editing. Many creators benefit from combining both approaches rather than relying exclusively on one.
Final Thoughts
Learning how to create 3D models with AI can make digital design more accessible, particularly for beginners who want to experiment with characters, objects, or product concepts without building everything manually. Text prompts and reference images provide a convenient starting point, allowing creators to explore ideas and compare different designs.
However, generating a model is only one part of the process. Inspecting its geometry, refining textures, checking file compatibility, and testing the result in its intended application are still important steps. A model that looks impressive in a preview isn’t necessarily ready for animation, gaming, or 3D printing.
The most practical approach is to begin with simple projects, learn how to evaluate AI-generated results, and gradually develop basic editing skills. AI can make the starting process easier, while traditional modeling techniques provide the control needed to turn promising concepts into usable 3D assets.
Did this solve your problem?
Your answer helps Supportia prioritize updates. No account or email is required.